Building custom computer hardware from scratch to provide control logic requires a lot of design work just to get a microprocessor executing the necessary instructions. On the hardware side, the microprocessor requires power, a clock and all the I/O connections needed for the application, as well as connections for programming and debugging. On the software side, the programming language and operating system need to be chosen. Then these pieces need to be meshed together before it is possible to start developing the application. This can result in a very steep learning curve.
RELATED: Arduino vs. PLC for industrial control
For prototyping, or one-off systems, there are some useful options to flatten this learning curve quite a bit. The options offer varying levels of complexity and performance, combining pre-built, inexpensive hardware with free, open-source programming software. Getting started can be as simple as downloading the programming software and connecting the board to a host computer via a USB cable.
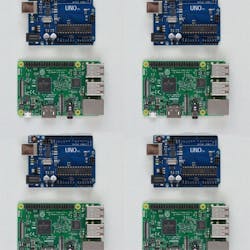
One of the simplest open-source systems is Arduino. Basic Arduino hardware consists of a small printed circuit board with a microprocessor that includes memory, discrete and analog I/O and a USB connector. The programming software is the Arduino integrated development environment (IDE), which is available for Windows, OS-X, and Linux operating systems.
There are several types of Arduino boards, with varying amounts of inputs, outputs and memory. The Arduino Uno is the entry-level version, built around an Atmel ATMEGA328 microprocessor. It offers 14 discrete I/O pins, including two that can generate pulse-width modulation (PWM) signals. Six other pins provide analog inputs, with a 10-bit analog-to-digital converter. The Arduino IDE provides several functions that provide access to the I/O, as well as support for timing, math and data conversion.
The microprocessor includes 2 KB of RAM that can be both read from and written to, and 32 KB of flash memory for program storage. One kilobyte of EEPROM can be used to store data when the board is not powered. The clock speed of the Arduino Uno is 16 MHz. This is not a lot of memory or speed when compared to personal computers or smart phones, but quite a lot can be done with even this level of resources.
Software for an Arduino is written in a programming language very similar to C, with basic commands such as if-else and switch-case, for-and-while loops and the ability to define and call functions. The Arduino website provides simple tutorials to help users get started.
The Arduino IDE provides a very simple model for executing your software. It starts with two functions, “setup()” and “loop().” The Arduino begins execution of the application code by calling “setup()” once. This is typically where the application initializes variables and defines I/O pin functions, as well as sets the initial state of any devices connected to the Arduino board. After “setup()” returns, Arduino calls “loop()”. When “loop()” returns, it calls “loop()” again and again until the unit is powered off. Thus, the “loop()” function defines the desired job it is supposed to perform.
If the application calls for more interfaces, the Arduino cards include connectors to allow expansion “shield” boards to be stacked. A large variety of these shields are available, including LCD displays, Ethernet interfaces and even a cell-phone interface. Shields are controlled by I/O pins on the main Arduino boards. If necessary, multiple boards can be stacked, but it is important to make sure they don’t conflict in their use of Arduino I/O pins. Many shields have software libraries that can be added to the Arduino IDE to simplify the programming.
Other, more sophisticated open-source systems are available. One example is Raspberry Pi. Its hardware isn’t much larger physically than the Arduino, but it provides quite a bit more sophistication. The Raspberry Pi 3 includes 1 GB of RAM, four USB ports, 802.11 wireless networking, an HDMI port and 40 general-purpose I/O pins, just to name a few of its features.
The processor is much faster than the Arduino, running at 1.2 GHz. All of this hardware and performance calls for a more sophisticated programming environment based on the Linux operating system. A keyboard and a mouse can be plugged into the USB ports, and a computer monitor or television to the HDMI port, and it becomes a type of PC.
Interestingly enough, the Raspberry Pi was originally intended to introduce children to programming, so many very basic instructional tutorials are provided for beginners. With such a powerful hardware and operating environment, capabilities are vast, with the main limits being the time available for design, programming and test.
About the Author

Doug Reneker
circuit designer
Doug Reneker is a retired electrical engineer and circuit designer who worked for Bell Labs, Recon/Optical and Arris. He has a BS and MS in electrical engineering from Iowa State University. Contact him at [email protected].

Leaders relevant to this article:

