How to leverage AI and sensors for manufacturing equipment
Key highlights
- These systems offer advanced capabilities like 3D measurement, defect detection using AI and integration with SPC software for comprehensive process monitoring and quality control.
- Implementing vision inspection can automate critical quality checks, reduce manual errors and provide data-driven feedback to optimize the performance of manufacturing machinery.
- Vision systems integrate with robots and AGVs to provide real-time visual guidance for automated material handling and assembly tasks.
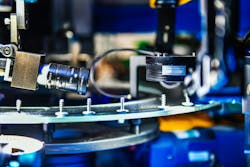
A vision inspection system, also known as a machine-vision system, uses cameras, sensors and artificial intelligence to automatically assess products for quality. These systems can help to identify defects, misalignments and other issues, and they can also perform other tasks like counting items and measuring dimensions.
Using vision inspection systems ensures quality control across the board for consumers and manufacturers. Vision inspection systems catch problems early to avoid a defective product moving down the supply chain or being sold to a consumer.
Vision inspection
Defects and flaw detection: Inspecting for product defects and flaws is the most popular of all vision system inspections.
Presence/absence: Presence/absence refers to inspecting the quantity or presence/absence of something on a target.
Product verification: Product verification uses the vision inspection system to check that a product’s label matches the product.
Character inspection and barcode reading: Vision inspection systems can be used to read both human-readable and machine-readable codes. Barcodes and human-readable characters must be checked for accuracy.
Technologies used in quality control via vision systems
Quality control via vision systems relies on various advanced technologies to inspect, monitor and assess products for defects or inconsistencies. These systems combine hardware and software to automate and enhance the inspection process in manufacturing and other industries.
Machine vision cameras
Industrial cameras: High-resolution cameras, such as a charge-coupled device (CCD) or a complementary metal-oxide semiconductor (CMOS) are used to capture images of products in real time. These cameras may operate in visible light or other wavelengths like infrared (IR) or ultraviolet (UV), depending on the requirements of the inspection process.
3D cameras: These provide depth perception and allow for detailed, dimensional inspection, including surface irregularities or defects that might be missed by 2D cameras.
Image processing software
Edge detection algorithms: Software analyzes images for edges, contours and boundaries of objects to detect features or defects, such as cracks or misalignment.
Pattern recognition: This technology allows the system to identify specific patterns, shapes or characters, which is useful for sorting, classification or defect detection.
Blob analysis: Used for detecting and analyzing objects based on the size, shape and position, typically for quality control tasks like counting or verifying the presence of parts.
Template matching: Compares the captured image to a reference template to detect discrepancies in size, shape or orientation.
Lighting and illumination systems
Structured light: A projector casts a pattern, such as a grid or stripes, onto the object being inspected. The system captures the deformed pattern to assess the object's 3D geometry or surface defects.
Backlighting: Used for detecting features on opaque objects or for examining the transparency of materials.
Diffuse or directed lighting: Helps highlight surface texture and defects by using various lighting angles or intensity levels.
Optical character recognition (OCR) and barcode scanning
OCR is used to read and verify text or numbers on products, such as serial numbers or expiration dates.
Barcode and QR code scanners are often integrated into vision systems to automate the identification and tracking of parts or products.
Artificial intelligence and machine learning
Deep learning: Convolutional neural networks (CNNs) and other deep learning models are used to classify and recognize complex patterns and defects that traditional algorithms might miss. These models are especially useful for tasks like defect detection, quality classification and anomaly detection.
Object detection: Machine-learning algorithms are trained to recognize various product types and detect misalignments or defects based on their visual features.
3D vision and depth sensing
Stereo vision: Using two or more cameras at different angles to generate 3D data, this technology helps in evaluating product shapes, thickness or surface variations in quality control.
Laser scanning: Laser sensors scan the surface of objects to generate precise 3D models, enabling detailed analysis of geometric features.
Sensor integration
Infrared (IR) sensors: Detect heat patterns, helping to identify defects related to temperature anomalies in the manufacturing process, such as overheated components or parts.
Ultrasonic sensors: In some vision systems, ultrasonic sensors work in tandem with cameras to detect flaws beneath the surface of materials.
Robotic integration
Robotic arms with vision systems: Often used in automated inspection systems where vision systems guide robotic arms to pick, place or rework parts based on the visual inspection results. This can help in identifying and correcting defective components automatically.
Get your subscription to Control Design’s daily newsletter.
Edge computing and cloud processing
Edge computing: In many modern systems, processing is done on-site using edge devices to reduce latency and ensure real-time decisions based on vision data.
Cloud-based vision systems: For larger-scale systems, cloud computing can be used for processing and storage, enabling access to more powerful computing resources and the ability to handle more complex image-processing tasks remotely.
Software integration for data analysis and reporting
Statistical process control (SPC): Vision systems often integrate with SPC software, allowing operators to analyze trends and detect patterns in defects, providing insights for quality improvements.
Data logging: Results from the vision system can be stored in databases or enterprise-resource planning (ERP) systems for traceability, further analysis and audit purposes.
Automated decision-making and feedback systems: Vision systems can integrate with manufacturing systems to automatically reject defective items, send alerts or provide feedback to operators or machines for corrective actions.
These technologies collectively enable vision-based quality control systems to perform high-speed, highly accurate inspections that reduce human error, increase throughput and improve overall product quality in manufacturing environments.
Manufacturing applications
Machine vision systems are used across industries for a variety of purposes, which include quality inspection, guidance and alignment, identification and classification, dimensional measurement and process monitoring.
Quality inspection: Machine vision compares digital images of products against reference images to detect imperfections in areas such as shape, color, finish or labeling. This helps manufacturers eliminate defective products before they reach customers.
Guidance and alignment: Cameras provide visual input for robot guidance systems and automated guided vehicles (AGVs), which enables them to correctly pick up, assemble and transport parts.
Identification and classification: Object recognition software can read barcodes, character strings and 2D codes to identify products for traceability and inventory management.
Dimensional measurement: Machine vision performs noncontact parts measurement to ensure dimensional accuracy and specifications are met. This allows manufacturers to optimize processes and minimize waste.
Process monitoring: Monitoring machines and automated lines with cameras can detect operational issues in real time, which reduces unplanned downtime and increases production efficiency.
Next steps
- Identify specific areas in current or planned manufacturing machinery where vision inspection could improve quality, efficiency or automation.
- Explore introductory resources or demos from vendors of vision hardware and software.
- Consider a small-scale pilot project to evaluate the feasibility and benefits of integrating a vision system into a specific part of machinery.
About the Author

Charles Palmer
Charles Palmer is a process control specialist and lecturer at Charles Palmer Consulting (CPC). Contact him at [email protected].

Leaders relevant to this article:
